

Introduction:
Installing an exhaust fan for kitchen is a crucial step toward improving air quality and maintaining a comfortable cooking environment. However, the installation process can seem daunting if you’re unfamiliar with the specifics. To make this task more manageable, we’ll guide you through the necessary steps, tools, and considerations to help ensure a smooth installation. By understanding each phase, you can confidently tackle this project and enjoy the benefits of your new kitchen exhaust fan.
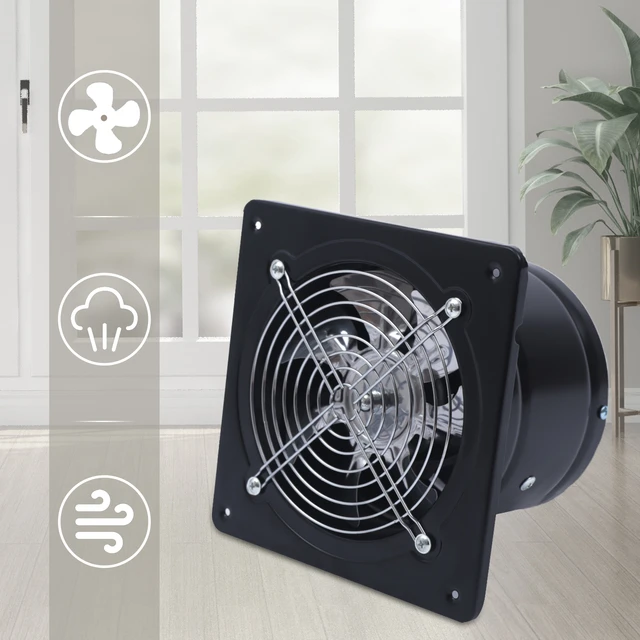
How to Install an Exhaust Fan for Your Kitchen?
Gathering Necessary Tools and Materials
Before you begin the installation, it’s important to gather all the necessary tools and materials. Having everything on hand will make the process more efficient and less stressful.
Tools: You’ll need a variety of tools including a power drill, screwdriver, level, tape measure, utility knife, wire stripper, and a stud finder. Depending on your specific situation, you might also require a reciprocating saw, flashlight, or hammer.
Materials: The materials you’ll need include the exhaust fan unit, screws, wall anchors, duct tape, wire nuts, an electrical box, and potentially ducting material if you are installing a ducted fan. You might also need sealant to ensure that there are no air leaks around the fan or the ductwork.
Safety Gear: Safety should not be overlooked. Wear safety goggles and gloves to protect yourself during the installation process. A dust mask can also be useful, especially when cutting through drywall.
Choosing the Optimal Location
Selecting the optimal location for your exhaust fan is crucial for its effectiveness. The placement can significantly impact the fan’s ability to remove smoke, steam, and odors from your kitchen.
Center Above the Stove: The most effective location for an exhaust fan is directly above the stove or cooking area. This allows the fan to capture the maximum amount of smoke and fumes. Use your tape measure and level to mark the exact center point above the stove.
Access to Power and Ventilation: Ensure the selected location is near an electrical source for powering the fan. If you are installing a ducted exhaust fan, you’ll also need to identify a clear path for the ductwork to the outside. Remember, shorter duct runs with fewer bends are more efficient and effective.
Avoiding Obstacles: Check for any obstacles within the wall or ceiling, such as studs, pipes, or electrical wiring. Using a stud finder can help you locate these internal structures, allowing you to avoid any complications during the installation process.
Prepping the Installation Area
After choosing the optimal location, the next step is to prepare the area for installation. Proper preparation ensures a smoother process and a more secure final installation.
Measuring and Marking: Measure and mark the area where the exhaust fan will be installed. Use your level to ensure that your markings are straight. Double-check your measurements to ensure accuracy, as any mistakes at this stage can lead to complications later on.
Cutting the Opening: If you are installing the exhaust fan in an existing kitchen, you’ll need to cut an opening for the fan. Use a utility knife or reciprocating saw to carefully cut along your marked lines. Ensure that the opening is the correct size for your fan.
Clearing Debris: Remove any debris or insulation from the opening to create a clean workspace. This step is particularly important if you’re cutting through drywall or other materials that can leave dust and particles behind.
Installing the Mounting Bracket
The mounting bracket is a crucial component that ensures your exhaust fan is securely attached to the wall or ceiling. Proper installation of the mounting bracket sets the foundation for the entire fan system.
Positioning the Bracket: Align the mounting bracket with the opening you’ve created. Use your level to ensure it is straight. This will help prevent any issues with alignment when you install the exhaust fan.
Securing the Bracket: Using your power drill, screw the mounting bracket into place. Ensure that it is securely attached to the studs for maximum stability. If you cannot attach the bracket directly to the studs, use wall anchors to secure it properly.
Double-Checking Alignment: Double-check the alignment of the mounting bracket before proceeding. Any misalignment at this stage can affect the overall installation and performance of the exhaust fan.
Installing the Exhaust Fan Unit
With the mounting bracket securely in place, you can proceed with installing the exhaust fan unit. This step will vary slightly depending on whether you are installing a ducted or ductless unit.
Positioning the Fan: Carefully position the exhaust fan unit onto the mounting bracket. Make sure that it aligns properly with the bracket and that the fan’s vents are oriented correctly.
Securing the Fan: Use screws or bolts to secure the exhaust fan unit to the mounting bracket. Ensure that it is firmly attached and does not wobble or shift. Tighten all connections to provide a stable and secure installation.
Connecting the Ductwork: If you are installing a ducted exhaust fan, now is the time to connect the ductwork. Attach the ducting material to the fan’s vent and secure it with duct tape to prevent any air leaks. Route the ductwork through the pre-determined path to an exterior vent.
Wiring the Exhaust Fan
The next critical step is wiring the exhaust fan to your home’s electrical system. Proper wiring ensures that the fan operates safely and effectively.
Shutting Off Power: Before you begin any electrical work, shut off the power to the kitchen from the circuit breaker. This precaution is essential to avoid any risk of electrical shock.
Connecting the Wires: Following the manufacturer’s instructions, connect the fan’s wiring to your home’s electrical system. Typically, you will need to connect the black (or red) wire to the hot wire, the white wire to the neutral wire, and the green wire to the ground wire. Use wire nuts to secure the connections and insulate them properly.
Double-Checking Connections: Double-check all electrical connections to ensure they are secure and correctly aligned. Improper wiring can cause the fan to malfunction or lead to safety hazards.
Restoring Power: After confirming that all connections are secure, restore power to the kitchen from the circuit breaker. Test the exhaust fan to ensure it operates correctly. Listen for any unusual sounds and check for proper air flow.
Sealing and Insulating
To maximize the efficiency of your exhaust fan, it is essential to seal and insulate the installation. Proper sealing prevents air leaks and ensures the fan’s optimal performance.
Sealing Gaps: Use a silicone-based sealant to seal any gaps around the exhaust fan’s housing and the wall or ceiling opening. Ensure that the sealant is evenly applied and creates a tight seal. This prevents warm indoor air from escaping and cold outdoor air from entering, which can affect your home’s energy efficiency.
Insulating Ductwork: If you have installed a ducted exhaust fan, consider insulating the ductwork. Insulation reduces heat loss and prevents condensation from forming inside the ducts. Use duct insulation material and secure it with duct tape for a comprehensive solution.
Finalizing the Installation
After sealing and insulating, your last step is to finalize the installation by conducting a thorough inspection and making any necessary adjustments.
Testing the Fan: Turn on the exhaust fan and check its operation. Ensure it is running smoothly and effectively removing smoke, odors, and steam from the kitchen. Pay attention to the noise level and ensure it is within acceptable limits.
Adjusting Settings: If your exhaust fan comes with adjustable speed settings or other features, take the time to familiarize yourself with these options. Adjust the settings to suit your cooking habits and preferences.
Cleaning Up: Remove any remaining debris and clean the installation area. Wipe down the exhaust fan unit to ensure it is free of dust and fingerprints. A clean exhaust fan not only looks better but also operates more efficiently.
Summary
By following these comprehensive steps, you can successfully install an exhaust fan in your kitchen. The process involves careful planning, precise measurements, and attention to detail. From gathering the necessary tools and materials to choosing the optimal location and performing the installation, each phase plays a critical role in ensuring the fan’s effectiveness and durability. Proper wiring, sealing, and insulating are crucial to achieving optimal performance, while a thorough final inspection ensures everything operates as intended. With your new exhaust fan properly installed, you can enjoy a cleaner, more comfortable cooking environment that enhances your overall kitchen experience.