
Creating delicious, creamy ice cream in the comfort of your home has never been easier. Understanding how to make homemade ice cream with an ice cream maker allows you to customize flavors, control ingredients, and enjoy a dessert that’s tailored to your taste. Whether you’re a seasoned dessert enthusiast or a beginner eager to explore the world of homemade treats, this comprehensive guide will walk you through the essential supplies you need, step-by-step instructions, and valuable tips to ensure your ice cream-making experience is both enjoyable and successful.
 Essential Supplies for Making Homemade Ice Cream
Key Ingredients You Will Need
To embark on your journey of making homemade ice cream, gathering the right ingredients is crucial. The foundational ingredients typically include:
- Whole Milk: Provides a creamy base for your ice cream.
- Heavy Cream: Adds richness and smoothness, contributing to the luxurious texture of the final product.
- Granulated Sugar: Balances the flavors and plays a role in the ice cream’s texture by lowering the freezing point.
- Egg Yolks (optional): Used in custard-based ice creams to enhance creaminess and richness.
- Flavorings: Vanilla extract, cocoa powder, fruit purees, or any other desired flavorings to customize your ice cream.
- Mix-Ins: Ingredients like chocolate chips, nuts, or fruit pieces can be added for added texture and flavor.
Ensuring you have high-quality ingredients will significantly impact the taste and texture of your homemade ice cream. Freshness is key, so opt for the best quality dairy products available.
Choosing the Right Ice Cream Maker
Selecting the appropriate ice cream maker is a pivotal step in how to make homemade ice cream with an ice cream maker. There are several types of ice cream makers to consider:
- Manual Ice Cream Makers: These require you to churn the ice cream by hand. They are generally more affordable but demand more effort and time.
- Electric Ice Cream Makers: Automated machines that handle the churning process for you. They are more convenient and consistent, making them a popular choice for most home cooks.
- Compressor Ice Cream Makers: High-end models that don’t require pre-freezing of the bowl. They offer the most flexibility and are ideal for frequent ice cream makers who desire unlimited batches.
When selecting an ice cream maker, consider factors such as ease of use, capacity, and the types of ice cream you plan to make. Investing in a quality machine will ensure smoother, creamier results every time.
Additional Tools and Equipment
Besides the ice cream maker and basic ingredients, having a few additional tools can enhance your ice cream-making process:
- Mixing Bowls: Essential for combining ingredients thoroughly.
- Whisk and Spatula: For mixing and scraping down sides to ensure even distribution of ingredients.
- Measuring Cups and Spoons: Accurate measurements are crucial for consistent results.
- Ice Cream Scoop: Makes serving your homemade ice cream neat and easy.
- Freezer-Safe Containers: Ideal for storing your finished ice cream to maintain its texture.
- Thermometer (optional): Useful for checking the temperature of your custard base, ensuring it thickens properly.
Having these tools on hand will streamline the process, making it easier to create smooth, flavorful ice cream every time you decide to make a batch.
Step-by-Step Guide: How to Make Homemade Ice Cream with an Ice Cream Maker
Preparing Your Ice Cream Base
Creating a smooth and creamy ice cream begins with a well-prepared base. Follow these steps to prepare your base effectively:
- Combine Milk and Cream: In a mixing bowl, whisk together equal parts whole milk and heavy cream. This mixture forms the rich foundation of your ice cream.
- Add Sugar: Incorporate sugar into the milk and cream mixture. Stir until the sugar is fully dissolved, ensuring a sweet and balanced flavor in your final product.
- Create a Custard Base (Optional): For an extra creamy texture, you can make a custard base by gently heating egg yolks in a separate bowl. Slowly pour the hot milk and cream mixture into the yolks while continuously whisking. Return the mixture to the saucepan and cook over low heat until it thickens slightly, being careful not to let it boil.
- Incorporate Flavorings: Add your chosen flavorings, such as vanilla extract, cocoa powder, or fruit purees, to the base mixture. Stir thoroughly to ensure even distribution of flavors.
- Chill the Base: Refrigerate the mixture for at least 2 hours, or preferably overnight. A well-chilled base will churn more efficiently, resulting in smoother ice cream.
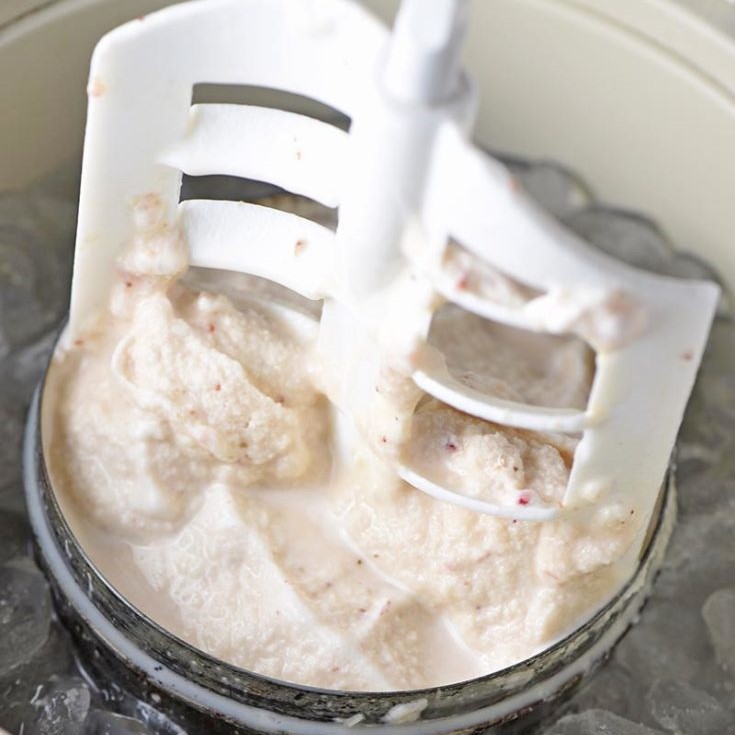
Churning the Ice Cream
Once your base is ready, it’s time to churn your ice cream:
- Set Up the Ice Cream Maker: Ensure your ice cream maker’s bowl is properly frozen if necessary. Follow the manufacturer’s instructions for setup and pre-freezing requirements.
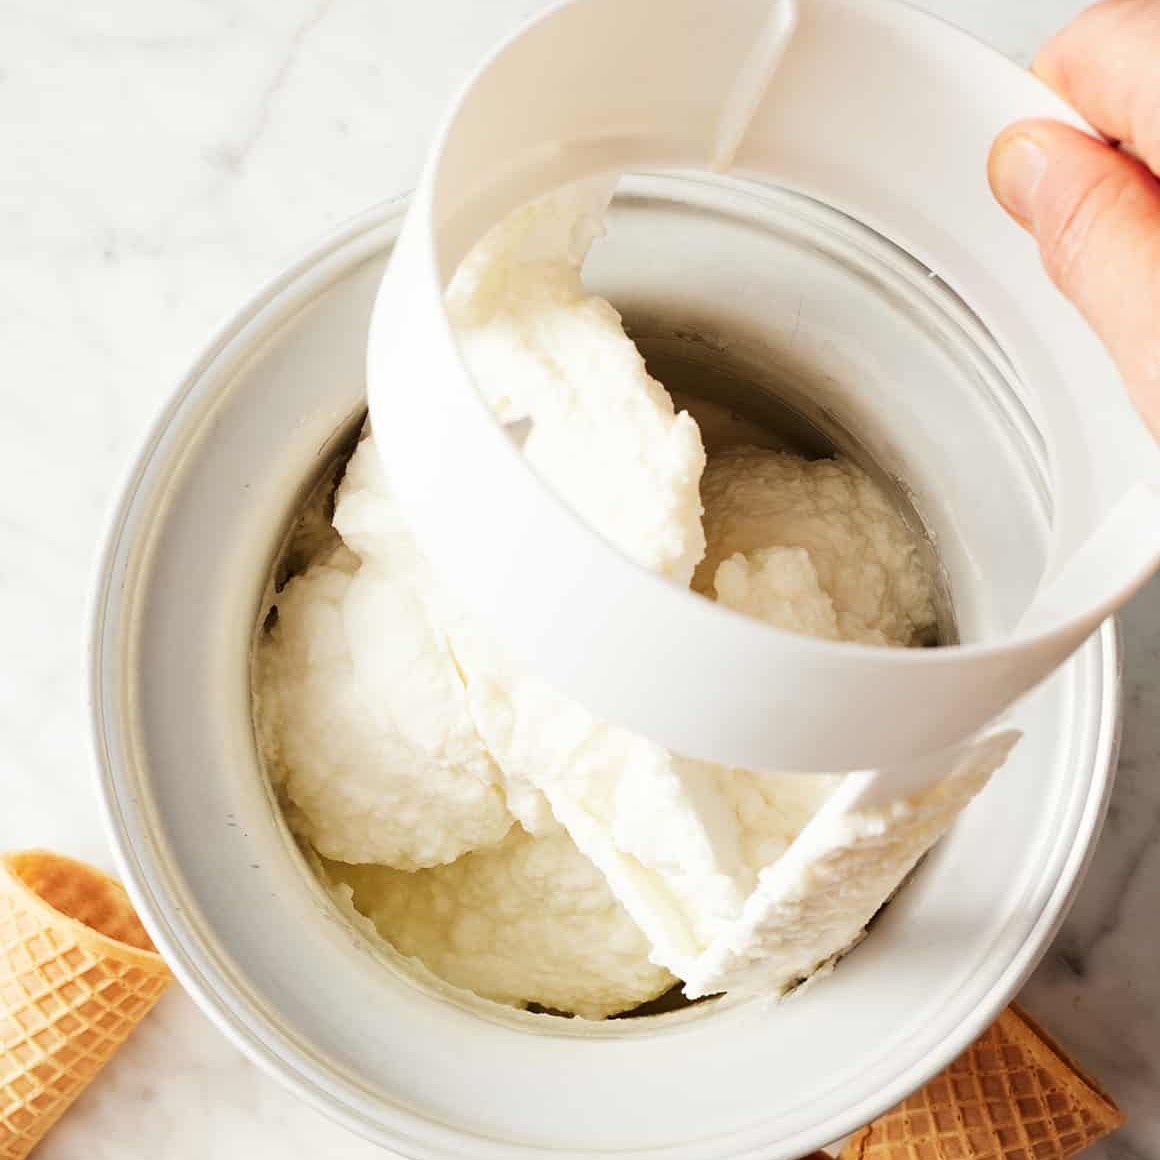
- Pour the Base into the Machine: Transfer the chilled ice cream base into the ice cream maker’s bowl. Secure the lid to prevent any contaminants from entering during the churning process.
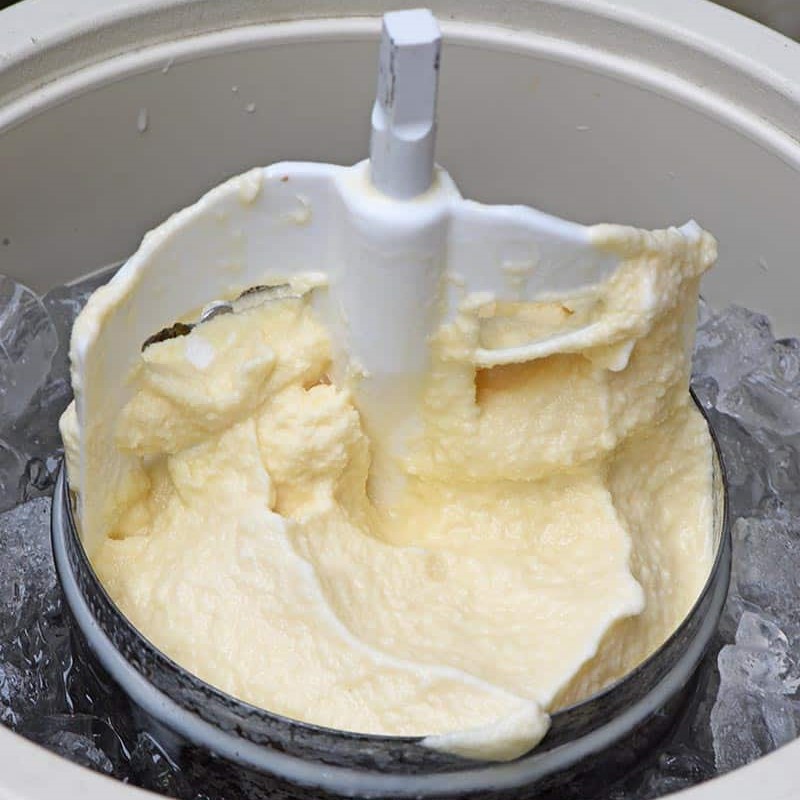
- Churn the Mixture: Turn on the ice cream maker and let it churn the mixture. This process typically takes about 20-30 minutes, depending on your machine. As the ice cream churns, the mixture thickens and incorporates air, creating a light and creamy texture.
- Add Mix-Ins: If you desire add-ins like chocolate chips, nuts, or fruit pieces, add them during the last few minutes of churning. This ensures they are evenly distributed throughout the ice cream without sinking to the bottom.
Freezing and Serving
After churning, proper freezing is essential for achieving the perfect consistency:
- Transfer to a Freezer-Safe Container: Once churning is complete, scoop the ice cream into a clean, airtight container. Smooth the top with a spatula to prevent ice crystals from forming.
- Freeze Overnight: Place the container in the freezer and allow the ice cream to firm up for at least 4 hours, or overnight for the best results. This step ensures your ice cream reaches the desired scoopable consistency.
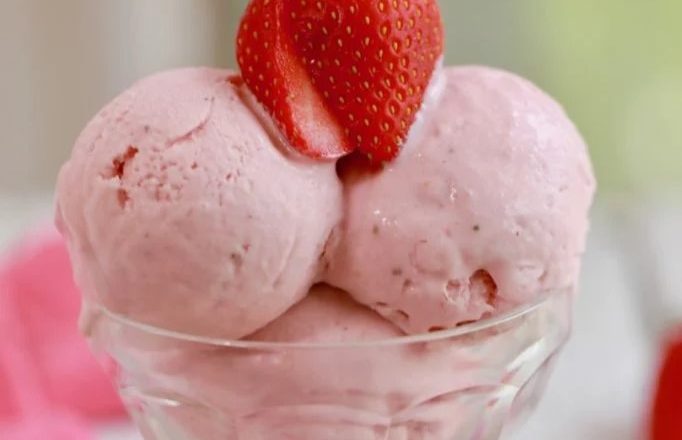
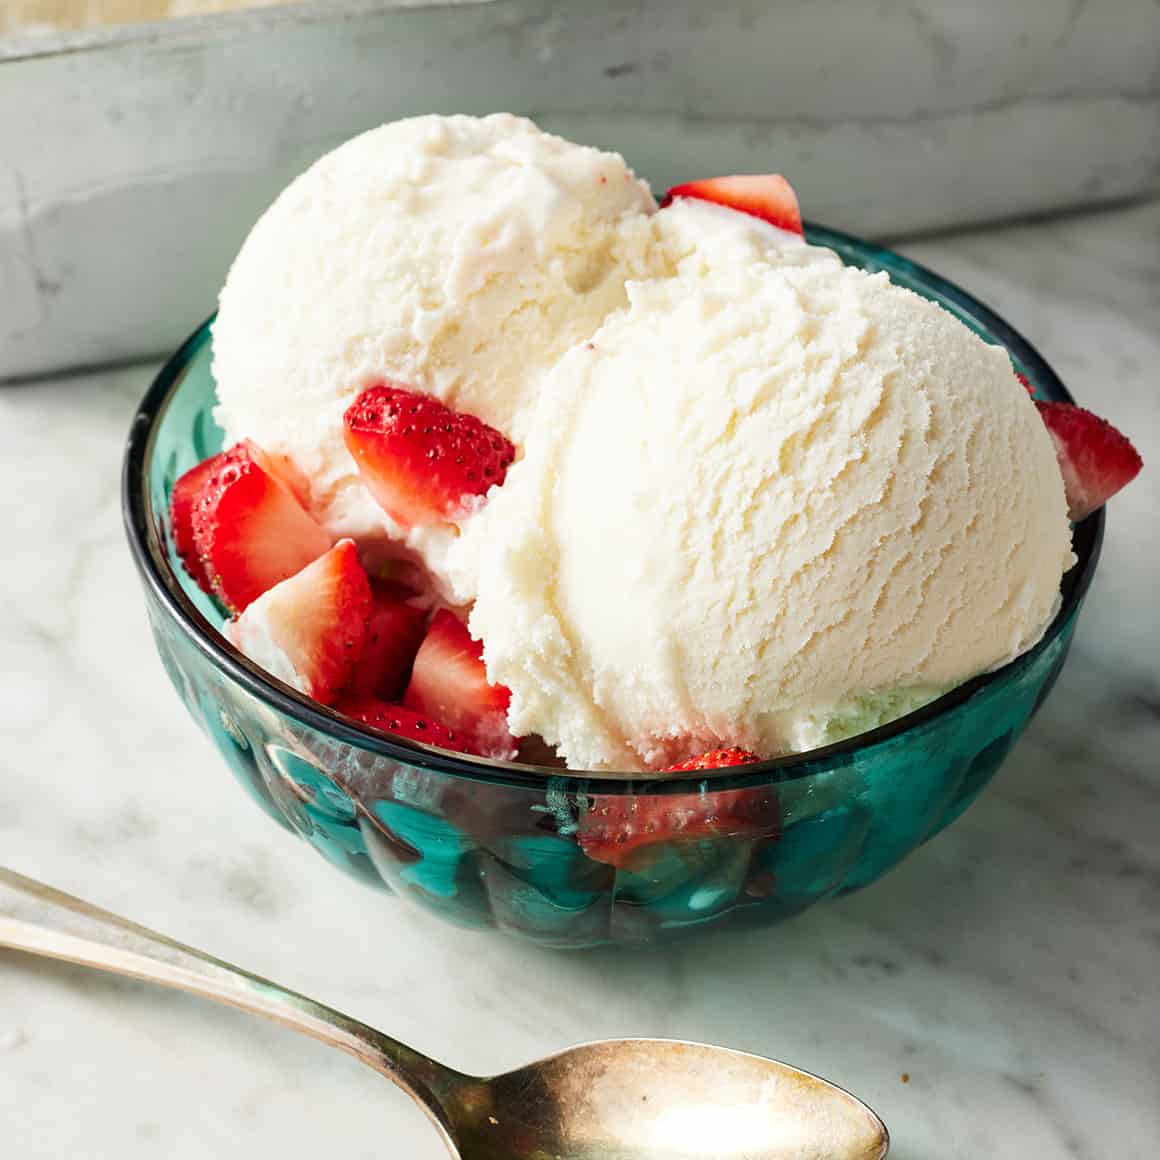
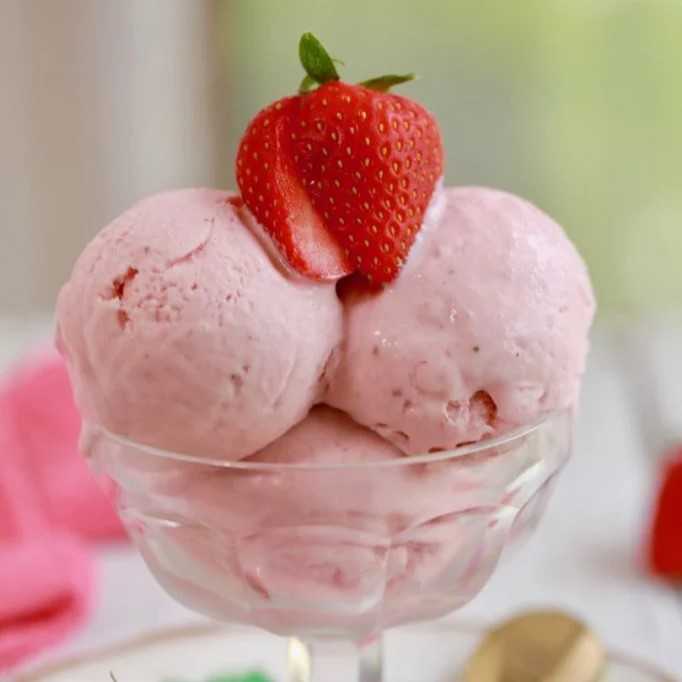
- Serve and Enjoy: Scoop your homemade ice cream into bowls or cones and enjoy! Garnish with your favorite toppings for an extra special treat.
 Creative Flavor Ideas for Homemade Ice Cream
Classic Vanilla and Chocolate
Sometimes, simplicity is best. How to make homemade ice cream with an ice cream maker can be perfectly executed with classic flavors like vanilla and chocolate. These timeless options provide a rich base for numerous toppings and mix-ins, allowing for endless customization.
Fruity and Refreshing
For a lighter, refreshing option, consider fruity flavors such as strawberry, mango, or lemon sorbet. Incorporating fresh fruit purees or zest adds natural sweetness and vibrant color to your ice cream, making it a delightful treat for any season.
Decadent and Indulgent
If you’re in the mood for something more indulgent, try flavors like caramel swirl, cookie dough, or peanut butter chocolate. These rich and creamy options satisfy intense sweet cravings and offer a luxurious texture that is sure to impress.
Exotic and Unique
Experiment with unique flavors such as matcha green tea, lavender honey, or pistachio almond. These exotic options add an intriguing twist to your homemade ice cream, making each scoop a new adventure for your taste buds.
Alcohol-Infused
For adults seeking a sophisticated treat, consider adding a splash of your favorite spirit, such as bourbon, rum, or Kahlua, to your ice cream base. Alcohol not only infuses flavor but also helps in achieving a smoother texture by preventing the ice cream from freezing too hard.
Troubleshooting Common Ice Cream Making Issues
Ice Cream is Too Hard
If your ice cream turns out too hard, it might be due to over-chilling or not churning it sufficiently. Ensure that you don’t leave the ice cream in the freezer for too long and make sure to follow the churning instructions accurately. Adding a bit more cream to your base can also help maintain a softer texture.
Ice Crystals Forming
Ice crystals can form if the ice cream is not churned properly or if the container is not airtight. To prevent this, make sure your base is thoroughly chilled before churning and transfer the ice cream to a freezer-safe container immediately after churning. Smooth the surface of the ice cream before sealing the container to minimize crystal formation.
Ice Cream is Lumpy
Lumpy ice cream can result from improper mixing or overheating during the custard-making process. Whisk ingredients thoroughly and cook the custard mixture over low heat, stirring constantly until it thickens slightly. Avoid letting the mixture boil to prevent curdling the eggs.
Ice Cream Doesn’t Freeze Properly
If your ice cream doesn’t freeze properly, it might be due to an uneven temperature in your freezer or inadequate chilling of the base. Ensure your freezer is set to the correct temperature (ideally -4°F to 0°F) and allow the base to chill for at least 2 hours before churning. Additionally, cover the container tightly to maintain a consistent freezing environment.
 Choosing the Right Ice Cream Maker for Homemade Ice Cream
Consider Your Budget
Ice cream makers come in a wide range of prices, from affordable manual devices to high-end electric and compressor models. Determine your budget before making a purchase, and consider how frequently you plan to use the machine. A higher initial investment might be worthwhile if you intend to make ice cream regularly.
Evaluate Capacity Needs
The capacity of an ice cream maker determines how much ice cream you can make in one batch. Smaller machines are ideal for single servings or couples, while larger units are better suited for families or those who entertain frequently. Consider your household size and consumption habits when choosing the right capacity.
Look for Easy Cleaning Features
Cleaning an ice cream maker can be a hassle if it’s not designed with convenience in mind. Look for models with removable parts that are dishwasher safe, or those that can be easily rinsed under running water. Some advanced machines even have self-cleaning functions, making the cleanup process effortless.
Assess Durability and Warranty
A durable ice cream maker will last for years with proper care. Check the build quality, including the materials used in construction and the reputation of the brand. Additionally, a good warranty can provide peace of mind, ensuring that any potential defects or issues are covered under the manufacturer’s terms.
Read Customer Reviews
Before making a final decision, read customer reviews to gain insights into the performance and reliability of various ice cream makers. Pay attention to feedback on ease of use, consistency of results, and overall satisfaction. Real-world experiences can help you make an informed choice and avoid common pitfalls.
Enhancing Your Ice Cream Making Experience
Experiment with Homemade Flavors
One of the joys of making homemade ice cream is the ability to experiment with unique flavors. Try incorporating fresh fruits, spices, or even savory ingredients to create one-of-a-kind ice cream that matches your personal preferences. This creativity allows you to tailor your ice cream to suit any occasion or mood.
Incorporate Natural Sweeteners
For a healthier twist, consider using natural sweeteners like honey, maple syrup, or agave nectar instead of granulated sugar. These alternatives not only reduce the glycemic index of your ice cream but also add distinct flavors that can complement your chosen ingredients.
Add Texture with Mix-Ins
Enhance the texture of your ice cream by adding mix-ins such as crushed cookies, nuts, chocolate chips, or fruit preserves. These additions provide delightful contrasts to the smooth ice cream, making each bite more interesting and enjoyable.
Utilize Seasonal Ingredients
Take advantage of seasonal ingredients to create fresh and vibrant ice cream flavors. For example, use pumpkin puree and spices for a fall-themed ice cream, or incorporate berries and citrus during the summer months. Seasonal flavors can keep your ice cream repertoire exciting and relevant throughout the year.
Create Perfect Swirls
Swirls of caramel, fudge, or fruit sauces can elevate the appearance and taste of your homemade ice cream. To achieve ribbon-like swirls, pour the sauce over the ice cream during the last few minutes of churning, allowing it to blend slightly without fully integrating.
 Storing and Serving Your Homemade Ice Cream
Proper Storage Techniques
Storing your homemade ice cream correctly is essential to maintain its texture and flavor. Transfer the ice cream to an airtight container to prevent freezer burn and flavor absorption from other foods. Press a piece of plastic wrap directly onto the surface of the ice cream before sealing the container with a lid. This method helps minimize ice crystal formation and keeps your ice cream smooth.
Serving Tips
When it’s time to enjoy your homemade ice cream, let the container sit at room temperature for a few minutes to soften slightly. This makes scooping easier and prevents the ice cream from becoming too hard. Use a warm ice cream scoop for smoother servings and a more elegant presentation.
Garnishing Ideas
Enhance the visual appeal and flavor of your ice cream by adding garnishes such as fresh fruit, drizzle of chocolate or caramel sauce, sprinkles, or a dollop of whipped cream. These toppings not only make your ice cream look more appetizing but also add an extra layer of taste and texture.
Frequently Asked Questions
What Temperature Should I Use for Making Ice Cream?
When how to make homemade ice cream with an ice cream maker, temperature plays a critical role in achieving the perfect texture. Typically, using an ice cream maker that reaches temperatures between -5°F to 0°F is ideal. Ensure your freezer is set to the correct temperature to allow the ice cream to freeze properly during the churning process.
Can I Make Ice Cream Without Using an Egg Yolks?
Yes, you can make ice cream without using egg yolks. While egg yolks create a rich and creamy custard base, they are optional. For an egg-free version, rely on a combination of whole milk, heavy cream, and sugar to achieve a smooth texture. This option is suitable for those with dietary restrictions or who prefer a simpler recipe.
How Long Does It Take to Make Ice Cream with an Ice Cream Maker?
The time it takes to how to make homemade ice cream with an ice cream maker varies depending on the type of machine used. Generally, the churning process takes about 20-30 minutes. After churning, the ice cream needs to be transferred to a freezer-safe container and frozen for at least 4 hours, or overnight, to firm up to a scoopable consistency.
Can I Make Sorbet or Gelato with an Ice Cream Maker?
Absolutely! An ice cream maker is versatile and can be used to make sorbet, gelato, and other frozen desserts. Sorbet typically requires a similar process to ice cream but uses fruit purees instead of dairy ingredients. Gelato, on the other hand, has a denser texture and is churned at a slower speed, incorporating less air. Adjust your recipes accordingly to explore different frozen treats.
How Do I Prevent My Ice Cream from Becoming Icy?
To prevent your ice cream from becoming icy, ensure you follow these tips:
- Proper Chilling: Chill your ice cream base thoroughly before churning.
- Proper Storage: Store ice cream in an airtight container with a layer of plastic wrap directly on the surface.
- Avoid Over-churning: Stop the ice cream maker once the ice cream reaches a soft-serve consistency to prevent excessive freezing.
- Add Stabilizers: Incorporate ingredients like cornstarch or glycerin that help retain moisture and prevent ice crystal formation.
 Conclusion
Understanding how to make homemade ice cream with an ice cream maker unlocks a world of delicious possibilities right in your kitchen. By gathering the essential supplies, following a meticulous step-by-step process, and experimenting with creative flavors, you can craft ice cream that rivals even the most iconic ice cream parlors. Whether you prefer classic flavors or adventurous combinations, homemade ice cream offers a customizable and enjoyable dessert experience. Embrace the joy of making your own ice cream, and savor the rich, creamy results that only homemade treats can provide. With the right tools and techniques, your homemade ice cream endeavors will become a delightful part of your culinary repertoire, bringing sweetness and satisfaction to every scoop.