
Creating your own ice cream at home can be a delightful and rewarding experience. Whether you’re a seasoned chef or a novice looking to explore culinary adventures, understanding how to use ice cream maker effectively is essential for achieving smooth, creamy, and delicious frozen desserts. A key aspect of this process is knowing how long do you churn ice cream in an ice cream maker to ensure the best texture and flavor. This comprehensive guide will walk you through the steps of using an ice cream maker, highlight the importance of churning time, and offer practical tips to elevate your homemade ice cream experience.
 Getting Started with Your Ice Cream Maker
Before diving into the specifics of churning time, it’s important to familiarize yourself with your ice cream maker. Firstly, ensure that all components are clean and properly assembled. Moreover, understanding the functionality of each part will help you operate the machine smoothly and efficiently.
Understanding the Components
A typical ice cream maker consists of several key parts:
- Freezing Bowl: This is where the mixture freezes and churns. Ensure it’s pre-frozen for at least 24 hours before use.
- Dasher or Paddle: This mechanism stirs the ice cream mixture, incorporating air and preventing large ice crystals from forming.
- Motor Base: Powers the dasher and controls the speed at which the mixture is churned.
- Lid and Handles: Keep the mixture contained and allow for easy handling and pouring.
Preparing the Ice Cream Mixture
Secondly, preparing the ice cream base is crucial for a successful outcome. Additionally, selecting the right ingredients can make a significant difference in the final product. Here’s a basic recipe to get you started:
Basic Vanilla Ice Cream Recipe
- Ingredients:
- 2 cups heavy cream
- 1 cup whole milk
- 3/4 cup granulated sugar
- 1 tablespoon pure vanilla extract
- A pinch of salt
- Instructions:
Mix Ingredients: In a large bowl, whisk together the heavy cream, milk, sugar, vanilla extract, and salt until you fully dissolve the sugar.
Chill the Mixture: Cover the bowl and refrigerate the mixture for at least 2 hours or overnight to ensure you chill it well before churning.
Prepare the Freezing Bowl: Remove the freezing bowl from the freezer and ensure that you freeze it thoroughly.
 The Churning Process: How Long Do You Churn Ice Cream in an Ice Cream Maker?
One of the most critical aspects of making ice cream is managing the churning time. But how long do you churn ice cream in an ice cream maker? The answer depends on several factors, including the type of ice cream maker you’re using, the recipe, and your desired consistency.
Churning Duration Based on Ice Cream Maker Types
Firstly, different ice cream makers have varying churning times. For instance, manual ice cream makers typically require longer churning periods compared to electric models.
Manual Ice Cream Makers
Manual or hand-crank ice cream makers often take between 20 to 30 minutes to churn the mixture. Additionally, the process requires consistent stirring to incorporate air and prevent the formation of ice crystals.
- Steps:
- Mix and Pour: Pour the chilled mixture into the manual ice cream maker.
- Crank Consistently: Begin cranking at a steady pace, ensuring that the mixture is evenly churned.
- Monitor the Texture: After about 20 minutes, the mixture should thicken and reach a soft-serve consistency.
Electric Ice Cream Makers
Electric ice cream makers are more efficient and generally complete the churning process within 20 to 30 minutes as well. Moreover, they provide a more consistent stir, resulting in a smoother texture.
- Steps:
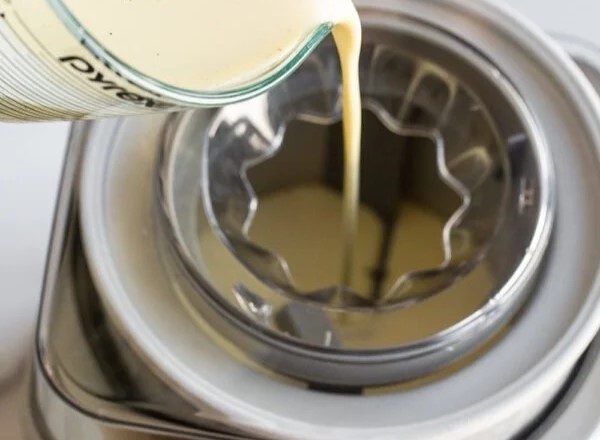
- Pour the Mixture: Transfer the chilled mixture into the pre-frozen bowl of the electric ice cream maker.
- Start the Machine: Turn on the machine and let it run for the recommended duration, usually 20 to 30 minutes.
- Check for Desired Consistency: The ice cream should be thick enough to hold its shape but still soft enough to scoop easily.
Factors Influencing Churning Time
Secondly, several factors can influence the churning time of your ice cream maker, affecting both the texture and the overall outcome.
Temperature of the Mixture
Moreover, the initial temperature of your ice cream mixture plays a significant role. As a result, a well-chilled mixture will churn more efficiently and require less time. Therefore, always ensure your mixture is thoroughly chilled before starting the churning process.
Type of Ingredients
The ingredients used in your ice cream mixture can also affect churning time. For example, high-fat ingredients like heavy cream and whole milk produce a creamier texture and may require longer churning compared to low-fat alternatives.
Desired Consistency
Furthermore, how long you churn your ice cream depends on the consistency you aim to achieve. If you prefer a softer, more scoopable ice cream, you can stop the machine earlier. Conversely, for a firmer texture, allow the churning process to continue until the desired consistency is reached.
 Tips for Perfectly Churned Ice Cream
Achieving the perfect texture in homemade ice cream goes beyond just understanding churning time. Additionally, implementing these practical tips can enhance the overall quality of your ice cream.
Use Quality Ingredients
Firstly, using high-quality ingredients is fundamental. Not only does this improve the taste, but it also contributes to a smoother texture. For example, using real vanilla extract instead of artificial flavors makes a noticeable difference.
Pre-Freeze the Mixture
Moreover, pre-freezing the ice cream mixture for at least 2 hours ensures that it churns more effectively. Consequently, integrating this step into your preparation process can significantly reduce the likelihood of ice crystallization.
Avoid Overfilling the Ice Cream Maker
Also, be mindful not to overfill your ice cream maker. Instead, follow the manufacturer’s guidelines regarding the maximum capacity. This allows ample space for the mixture to expand and incorporate air during churning, resulting in a creamier texture.
Incorporate Mix-Ins Properly
Adding mix-ins like chocolate chips, nuts, or fruit preserves at the right time is essential. Generally, it’s best to add these ingredients in the last 5 minutes of churning. Furthermore, this ensures that they are evenly distributed without disrupting the smoothness of the ice cream base.
Maintain Proper Freezer Conditions
Additionally, maintaining optimal freezer conditions by keeping the ice cream maker in a consistently cold environment can aid in efficient churning. Therefore, ensure that the freezing bowl remains at the recommended temperature before embarking on the churning process.
Cleaning and Maintenance of Your Ice Cream Maker
Proper maintenance of your ice cream maker ensures its longevity and continues to perform optimally. Therefore, it’s essential to adhere to a regular cleaning routine.
Cleaning After Each Use
Firstly, always clean your ice cream maker immediately after use to prevent residue buildup. Moreover, disassemble the components as per the manufacturer’s instructions and wash them with warm, soapy water. Additionally, ensure that all parts are thoroughly dried before reassembling to avoid ice buildup during future uses.
Storing Your Ice Cream Maker
Storing your ice cream maker correctly is equally important. For instance, keep it in a dry place away from direct sunlight or moisture to prevent any potential damage to the electrical components or freezing bowl.
Regular Maintenance Checks
Furthermore, perform regular maintenance checks to ensure that all parts are functioning correctly. This includes inspecting the freezing bowl for any cracks or damages and ensuring that the dasher moves smoothly without any obstructions.
 Troubleshooting Common Issues
Even with proper usage, you might encounter some common issues while using your ice cream maker. Nonetheless, these can often be resolved with a few simple steps.
Ice Cream Won’t Freeze Properly
If your ice cream isn’t freezing properly, there are several possible reasons:
- Insufficient Freezing Time: Ensure the freezing bowl is frozen for at least 24 hours before use.
- Improper Chilling of the Mixture: The mixture should be thoroughly chilled before churning.
- Overcrowding the Ice Cream Maker: Avoid overfilling to allow proper air incorporation.
Ice Cream Is Too Hard or Crystalline
If your ice cream turns out too hard or crystalline, consider the following factors:
- Over-Churning: Stopping the machine earlier can prevent the ice cream from becoming too hard.
- Temperature Fluctuations: Ensure that the freezing bowl remains consistently cold during the churning process.
- High Sugar Content: Excess sugar can lead to a harder texture. Adjusting the sugar levels can help achieve a smoother consistency.
Uneven Mix-Ins Distribution
To avoid uneven distribution of mix-ins like chocolate chips or fruit pieces:
- Add Mix-Ins Towards the End: Incorporate them in the last few minutes of churning.
- Use Smaller Pieces: Smaller mix-ins are easier to distribute evenly throughout the ice cream.
Enhancing Your Ice Cream Maker Experience
Moreover, exploring different recipes and experimenting with flavors can make using your ice cream maker even more enjoyable. Here are some ideas to get you started:
Classic Vanilla Ice Cream
Creating a classic vanilla ice cream is a great starting point. Additionally, you can enhance the flavor by adding natural ingredients like vanilla bean or a splash of almond extract for an extra depth of flavor.
Chocolate Fudge Swirl
Furthermore, making a chocolate fudge swirl ice cream involves layering in swirls of rich chocolate syrup during the last few minutes of churning. This not only adds a delicious flavor but also creates an appealing marbled effect.
Fruit-Based Sorbets
For a lighter option, you can make fruit-based sorbets using your ice cream maker. Simply blend fresh fruits with a bit of sugar and lemon juice before churning. Consequently, this results in a refreshing and fruity frozen dessert perfect for hot days.
Custom Mix-Ins
Additionally, get creative with your mix-ins by adding ingredients like crushed cookies, caramel pieces, or nuts. Doing so allows you to personalize your ice cream and cater to different taste preferences.
The Importance of Patience and Practice
In conclusion, mastering how to use ice cream maker effectively requires patience and practice. Nevertheless, don’t be discouraged by initial attempts that may not turn out perfectly. Instead, view each batch as a learning experience that brings you closer to your perfect homemade ice cream.
Learning from Each Batch
Moreover, analyzing what worked and what didn’t in each attempt helps refine your techniques. For instance, adjusting the churning time based on the consistency achieved can lead to better outcomes in future batches.
Staying Consistent with Techniques
Additionally, maintaining consistency in your methods, such as always chilling the mixture adequately and following precise measurement guidelines, ensures more predictable and delightful results each time you use your ice cream maker.
 Final Thoughts
Creating ice cream at home with your ice cream maker is not only a fun and engaging activity but also a delicious way to satisfy your sweet cravings with personalized flavors. Understanding how long do you churn ice cream in an ice cream maker and implementing best practices can transform your frozen dessert-making experience. Ultimately, mastering these techniques empowers you to produce high-quality, creamy, and flavorful ice cream that rivals any store-bought version.
In summary, the key to successful ice cream making lies in understanding the nuances of your ice cream maker, optimizing the churning time, and continuously experimenting with flavors and ingredients. Therefore, embrace the process, enjoy the creativity, and relish the sweet rewards of your homemade treats. By following this comprehensive guide on how to use ice cream maker, you’re well on your way to becoming a proficient ice cream artisan, delighting yourself and your loved ones with every scoop.