
Introduction: The Charm of Vintage Ice Cream Makers
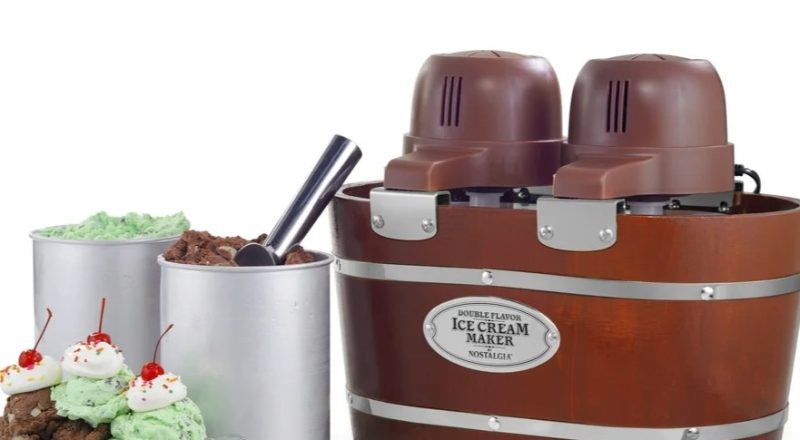
In an age of modern conveniences and high-tech kitchen gadgets, it is worth noting that there’s something truly special about using an old-school ice cream maker. Indeed, these charming devices bring a nostalgic flair to the art of ice cream making, allowing home chefs to create delightful frozen treats reminiscent of those enjoyed in bygone days. Not only do they evoke memories of summers spent enjoying rich, creamy desserts, but they also provide an opportunity to experiment with classic recipes.
Whether you’re an ice cream aficionado or a casual dessert lover, using an old school ice cream maker can enhance your culinary adventures. This guide will take you through the ultimate collection of vintage recipes tailored specifically for your beloved machine. Consequently, get ready to delight your taste buds with creamy textures and rich flavors as we explore a delightful array of recipes that truly reflect the golden age of ice cream making.
 The Joy of Making Homemade Ice Cream
Before diving into specific vintage recipes for your old school ice cream maker, it is essential to understand the inherent joys of making homemade ice cream.
1. Fresh Ingredients
One of the most significant advantages of using an old school ice cream maker is the ability to control the ingredients. You can select high-quality, fresh components, ensuring that your treats are delicious and wholesome.
- Flavor Quality: When you make ice cream from scratch, you determine the level of sweetness, the richness of cream, and the quality of mix-ins, resulting in an authentically tantalizing treat.
- Healthier Options: By choosing natural ingredients, you can not only create healthier alternatives to store-bought ice creams, but you can also tailor the sweetness to your preferences while avoiding preservatives.
2. Creative Flavor Combinations
An old school ice cream maker allows you to experiment with flavors that go beyond basic chocolate and vanilla.
- Unique Pairings: From lavender honey to roasted strawberry basil, the possibilities are truly endless. Moreover, you can get creative by incorporating various fruits, herbs, and even spices, resulting in distinctly unique flavors.
- Custom Blends: Why settle for store-bought flavors when you can combine your favorites? Using your old school ice cream maker lets you blend various flavors to create your own signature ice cream.
3. A Fun Family Activity
Making ice cream can also be an enjoyable activity for the whole family.
- Get Everyone Involved: Children can help mix and measure ingredients, while adults can manage the machine, creating precious family memories in the process.
- Special Events: Consider setting up an ice cream-making day for a birthday or summer gathering. Not only will this allow guests to participate in crafting their own flavors, but it will also add a fun and interactive element to your event.
 Vintage Ice Cream Recipes to Try
Now, let’s dive into the ultimate collection of vintage recipes specifically designed for your old-school ice cream maker. As a result, you can prepare your taste buds for a delicious journey through time!
1. Classic Vanilla Ice Cream
There’s nothing quite like a classic. This recipe is the foundation for many decadent desserts and is incredibly easy to make.
Ingredients:
- 2 cups heavy cream
- 1 cup whole milk
- 3/4 cup granulated sugar
- 2 teaspoons pure vanilla extract
- A pinch of salt
Instructions:
- Mix Ingredients: In a mixing bowl, whisk together the heavy cream, whole milk, granulated sugar, and salt until the sugar dissolves.
- Add Vanilla: Stir in the vanilla extract.
- Chill the Mixture: Refrigerate the mixture for at least two hours to ensure it’s very cold before pouring it into your ice cream maker.
- Process: Follow your ice cream maker’s instructions to churn the mixture until it reaches a pleasing consistency.
- Freeze: Transfer the ice cream to a container and freeze for several hours until firm.
2. Chocolate Chip Mint Ice Cream
This refreshing minty flavor pairs beautifully with chocolate chips, offering a delightful treat perfect for hot summer days.
Ingredients:
- 2 cups heavy cream
- 1 cup whole milk
- 3/4 cup granulated sugar
- 1 teaspoon peppermint extract
- 1 cup chocolate chips
- Green food coloring (optional)
Instructions:
- Combine Ingredients: In a mixing bowl, whisk together heavy cream, whole milk, sugar, and peppermint extract. If desired, add a few drops of green food coloring for a visually pleasing effect.
- Chill: Just like with the vanilla recipe, ensure the mixture is well-chilled before processing it in your ice cream maker.
- Churn and Add Chocolate Chips: Pour the base into your ice cream maker and churn. When it’s nearly done, add chocolate chips for a burst of flavor.
- Finish and Freeze: Once churned, transfer the ice cream to a container to freeze until fully set.
3. Strawberry Rhubarb Ice Cream
This delightful recipe not only combines the tartness of rhubarb with the sweetness of strawberries, but it also provides a refreshing balance that is perfect for the warmer months.
Ingredients:
- 2 cups fresh strawberries, hulled and sliced
- 1 cup rhubarb, chopped
- 1 cup granulated sugar
- 2 cups heavy cream
- 1 cup whole milk
- 1 tablespoon lemon juice
Instructions:
- Prepare the Fruit: In a saucepan, combine rhubarb, strawberries, 1/2 cup sugar, and lemon juice. Cook on medium heat until the rhubarb softens, about 5-10 minutes. Allow this mixture to cool.
- Combine Cream and Milk: In another bowl, whisk together heavy cream and whole milk with the remaining sugar until the sugar dissolves.
- Blend and Chill: Once the rhubarb and strawberry mixture has cooled, blend it with the milk and cream mixture. Chill in the refrigerator for a few hours.
- Churn: Follow your ice cream maker’s instructions to churn the mixture. Once it reaches the desired consistency, store it in the freezer until firm.
4. Maple Walnut Ice Cream
This classic flavor combines the natural sweetness of maple syrup with the crunch of walnuts for an irresistible treat.
Ingredients:
- 2 cups heavy cream
- 1 cup whole milk
- 1 cup pure maple syrup
- 1 teaspoon vanilla extract
- 1 cup walnuts, toasted and chopped
Instructions:
- Blend the Base: In a bowl, whisk together the cream, milk, maple syrup, and vanilla extract until well combined.
- Chill the Mixture: Refrigerate for about two hours to allow the flavors to meld and the mixture to become very cold.
- Churn with Walnuts: Pour the cold mixture into your ice cream maker. As it nears completion, add the toasted walnuts to the mix.
- Store: Once churned to your desired consistency, transfer to a container and freeze until set.
5. Old-Fashioned Vanilla Bean Ice Cream
For those who appreciate the simple goodness of vanilla, this old-fashioned recipe enhances the flavor with real vanilla beans.
Ingredients:
- 2 cups heavy cream
- 1 cup whole milk
- 3/4 cup granulated sugar
- 1 vanilla bean
- A pinch of salt
Instructions:
- Scrape the Vanilla Bean: Split the vanilla bean lengthwise and scrape out the seeds. Combine these seeds with the heavy cream and milk in a saucepan.
- Cook the Mixture: Add sugar and salt to the saucepan. Heat gently until the sugar dissolves, then remove from heat and let it cool.
- Chill the Mixture: Once cooled, refrigerate the mixture for several hours.
- Process: Pour the mixture into your ice cream maker and churn according to the manufacturer’s instructions.
- Freeze: Transfer the ice cream to a container for freezing until firm.
6. Classic Coffee Ice Cream
For coffee lovers, this rich and creamy coffee ice cream is a must-try!
Ingredients:
- 2 cups heavy cream
- 1 cup whole milk
- 3/4 cup granulated sugar
- 1 cup brewed coffee, cooled
- A pinch of salt
Instructions:
- Combine Ingredients: In a mixing bowl, whisk together heavy cream, milk, sugar, brewed coffee, and salt until smooth.
- Chill Before Churning: Refrigerate the mixture for about 2 hours to ensure it’s well-chilled.
- Churning Process: Pour the chilled mixture into your ice cream maker and churn according to the instructions.
- Set in Freezer: Once churned, freeze in a container until firm.
 Practical Tips for Making Ice Cream with Your Old School Ice Cream Maker
As you embark on your homemade ice cream adventure, it is important to keep a few practical tips in mind. Doing so will ensure that your experience is both smooth and enjoyable.
1. Proper Ingredient Preparation
- Chill Ingredients: Always use cold ingredients for your ice cream base. This helps the ice cream freeze faster while keeping the texture creamy.
- Measure Ingredients Accurately: To achieve consistent results, it is essential to use precise measurements. Therefore, invest in a good set of measuring cups and spoons to maintain the quality of your recipes.
2. Use Quality Ingredients
- Fresh Ingredients: Whenever possible, use fresh and natural ingredients. This enhances the flavor and quality of your ice cream significantly, making your treats taste exceptional.
3. Allow for Freezing Time
- Pre-Freeze the Ice Cream Bowl: If your old school ice cream maker requires pre-freezing the bowl, ensure it has at least 24 hours in the freezer prior to use.
- Be Patient: After churning, remember that your ice cream may still need additional time in the freezer to achieve a firm consistency. Allow it to set for several hours for the best texture.
4. Experiment with Flavors
- Mix and Match: Don’t hesitate to experiment with flavor combinations! You might discover a new favorite that you never expected.
- Add Mix-Ins: Try adding mix-ins like chocolate chips, crushed cookies, or fruit during the last few minutes of churning for added texture and flavor.
Maintenance Tips
Maintaining your old-school ice cream maker is essential to ensure it continues to function well and produces delicious frozen treats. Here are some tips for keeping your machine in good condition:
- Clean After Use: Always clean your ice cream maker immediately after use. Disassemble all removable parts and wash them in warm, soapy water. Rinse thoroughly and allow them to air dry.
- Check the Freezer Bowl: If your ice cream maker has a removable freezer bowl, ensure that it is properly frozen before use. For optimal results, place it in the freezer for at least 24 hours before you plan on making ice cream.
- Inspect Seals and Gaskets: Regularly check the seals and gaskets for any wear or damage. If you notice any cracks or signs of deterioration, replace them to prevent leaks during the ice cream-making process.
- Lubricate Moving Parts: If your ice cream maker has any moving parts, such as a churn or dasher, consider applying food-safe lubricant to ensure smooth operation. Refer to the manufacturer’s instructions for recommendations.
- Store Properly: When not in use, store your ice cream maker in a cool, dry place. If possible, keep it in its original box or wrap it in a protective covering to prevent dust accumulation.
- Regular Use: Finally, use your ice cream maker regularly! This not only keeps the machine in good working order but also ensures you have delicious homemade ice cream to enjoy.
By following these maintenance tips, you can extend the lifespan of your old-school ice cream maker and continue to create delightful frozen treats for years to come.
 Conclusion
In conclusion, the world of homemade ice cream is as expansive as it is delightful, especially when harnessing the joy of using an old school ice cream maker. By following this ultimate collection of vintage recipes and practical tips, you’ll surely create delicious treats while providing yourself and your loved ones with memorable, enjoyable experiences.
The beauty of ice cream making lies not just in the flavors you can create but also in the cherished memories formed around the process. Whether you are whipping up classic vanilla bean ice cream or experimenting with coffee flavors, be sure to embrace the creative outlet that this enchanting hobby provides. So gather your ingredients, prepare your ice cream maker, and start churning your way to sweet homemade success!